Updated: 4 June, 2026 | By Dan Milburn
There was a time I’d get so frustrated with a sputtering torch lighter that I’d just toss it in a “junk drawer” or, worse, the trash. I figured if a $60 Xikar or a dependable Vector wouldn’t fire up, it was a lemon. If my cheap Eagle torch died, I figured it just wasn’t worth the hassle.
I was wrong.
After years of dismantling and repairing thousands of lighters on my workbench, I’ve realized that 90% of “broken” torches—from premium cigar lighters to gas-station pocket jets—are actually just suffering from one of three minor issues: air in the tank, a dirty jet, or a misaligned igniter wire. Most of these can be fixed in under two minutes with nothing more than a can of air and a toothpick.
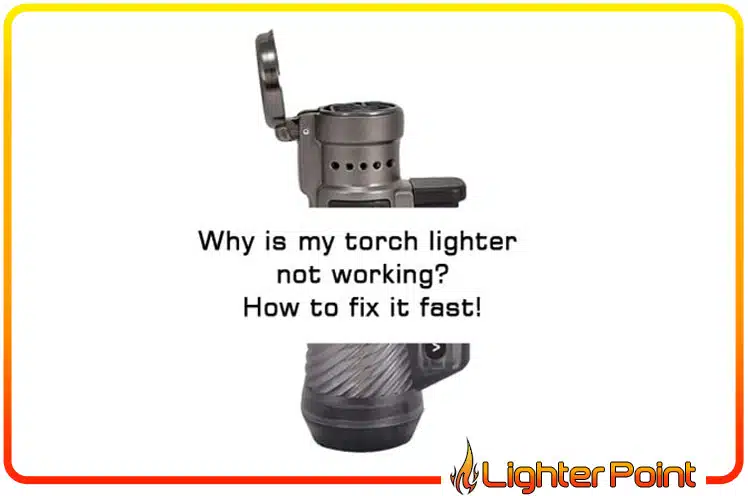
Whether you are dealing with a Clipper torch that’s not working, a premium Xikar that suddenly quits, or a butane torch flame problem right when you need to light a cigar or fire up a dab rig, the root causes are surprisingly universal. This butane torch troubleshooting guide is designed to answer the single most frustrating question on your workbench: why is my torch lighter not working? Let’s look at the exact diagnostic steps to take before throwing it away.
Disclosure: LighterPoint.com is a participant in the Amazon Services LLC Associates Program, as well as other affiliate programs, designed to provide a means for us to earn fees by linking to Amazon.com and affiliated sites at no extra cost to you. Please see the Affiliate Disclosure for more details.
The “Fixer’s Quick-Check” Diagnostic Table
If your torch lighter doesn’t work, use this 60-second diagnostic matrix to map your exact symptom to the right solution below.
| If your lighter is… | The likely culprit is… | The Quick Fix |
| Hissing but no flame | Flame set too high or too low | Turn dial to (-) and adjust up slowly – Jump to Step 1 |
| Sparks but won’t light | Clogged jet or misaligned wire | Jump to Step 2 & Step 4 |
| Sputtering / spitting fire | Air trapped in the fuel line | Jump to Step 3 (Purge) |
| No “click” or no spark | Dirty or misaligned igniter wire | Gently adjust the electrode wire – Jump to Step 2 |
| Won’t light right after refill | Tank is too cold or vapor-locked | Let it sit for 10 minutes / Purge – Jump to Step 3 |
| Hissing when NOT in use | Damaged internal O-ring seal | Jump to Time to retire the lighter |
I have a specific guide on troubleshooting Clipper Jet Lighters, but this guide can be used for any torch and jet flame lighters.

Step 1: The “Invisible” Problem (Flame Adjustment)
Before you reach for the tools, check your fuel dial. I’ve “fixed” dozens of lighters for friends just by turning an adjustment wheel or screw.
- The “Too High” Trap: If your flame is set to the absolute maximum, the pressure can actually “blow out” the spark before it has a chance to ignite the gas. It’s like trying to light a match in a hurricane. This is exactly why your lighter might hiss loudly but never catch a flame.
- The “Too Low” Trap: If it’s too low, there isn’t enough gas density coming out of the jets to catch the spark.
- A common torch lighter flame problem is when the butane lighter only lights for a second, or the torch lighter lights, then goes out immediately. This occurs when the valve isn’t open wide enough to sustain fuel delivery, resulting in a weak torch flame. Turn the wheel up incrementally past the 50% mark to stabilize the line.
- A common torch lighter flame problem is when the butane lighter only lights for a second, or the torch lighter lights, then goes out immediately. This occurs when the valve isn’t open wide enough to sustain fuel delivery, resulting in a weak torch flame. Turn the wheel up incrementally past the 50% mark to stabilize the line.
- The Fix: Turn the adjuster all the way to the absolute minimum (-) setting, and then slowly rotate it toward the plus (+) sign in tiny increments. Try striking it at the 50% mark and adjust from there.


Step 2: The Igniter Wire Sweet Spot (The Lighter Sparks But Won’t Light)
This is the hidden fix that 99% of generic review blogs completely miss. If you look straight down into the nozzle of your Eagle, Xikar, Vertigo, or basically any torch, you’ll see a tiny, bare metal wire pointing toward the jet holes. This is the electrode that delivers the electrical spark.
If your torch lighter sparks but doesn’t light, or if you find your torch lighter not sparking at all, the issue sits squarely with the ignition system. Alternatively, you might have a torch lighter that won’t click, a scenario where the ignition button feels stuck or lacks that sharp mechanical snap. Let’s look at how to fix a torch lighter that won’t spark using a simple physical alignment tool.
- The Problem: Through daily use, pocket drop impacts, or heat warping, that tiny wire can get bent out of place by just a millimeter. If the spark jumps to the side of the metal casing instead of directly over the gas jet, the rising butane will never ignite. It will just spark and hiss indefinitely.
- The Carbon Buildup Issue: Over time, a microscopic layer of soot and carbon can coat the tip of this wire, acting as an insulator and killing the strength of your spark.

The Fix:
- Use a wooden toothpick or a pair of plastic tweezers to gently nudge that wire so the tip sits directly over the center of the jet burner.
Important Safety Note: If your torch lighter won’t click or has no spark, check the small piezo electrode wire. Do not use metal tweezers to bend it while pressing the clicker, or you will get a static shock. - The Goal: You want the electrical arc to jump right through the exact path of the rising butane gas. If the wire looks dirty, gently scrape the tip with your toothpick to clean off any black carbon buildup.
Step 3: The Deep System Purge (Fixing the Sputter)
There is nothing more annoying than a torch lighter not working after a refill. You pull out your can of butane fuel, fill up the tank, and suddenly the torch lighter won’t light, or you notice the butane torch sputtering wildly. Why does my torch lighter sputter when it’s completely full of fresh gas? The answer is simple: trapped ambient air.”
Every single time you press a refill can into your lighter, a tiny amount of ambient room air forces its way into the chamber. Over 5 to 10 refills, that air builds up immense pressure, creating a “vapor lock” that makes the tank think it’s completely full when it’s actually mostly empty air.
Here is the exact step-by-step bench method to perform a total system purge:
- Safety First: Turn the flame adjustment wheel or screw all the way down to the lowest setting (-). This closes the internal fuel valve and keeps you safe from accidental bursts.
- Flip It Vertically: Hold the lighter upside down so the refill valve is facing straight up at the ceiling. This ensures the liquid butane stays at the bottom of the tank while the trapped air rises directly to the valve.
- Bleed the Air: Use a brass bleeding tool, a small screwdriver, or the tip of a pen to press straight down on the center pin of the refill valve. You will hear a loud hissing sound. Keep pressing firmly until that hissing stops completely.
- The Pro Secret (The Shake Trick): Shake the lighter vigorously for 3 seconds and press the valve again. It’s surprising how much hidden air stays trapped in the internal plastic baffling until you agitate it. Repeat this until pressing the valve yields absolute silence.
- Refill Correctly: Once completely empty and silent, insert your high-quality butane can upside down, press straight down firmly for 4–5 seconds, and repeat twice. (And remember the rule from our previous section: let it rest for 10 minutes to warm up before striking!)
Quick Pro Tip:
Shake the lighter and purge again. It’s surprising how much “hidden” air stays trapped in the internal baffling.

Following the lighter purge, refill your lighter. Check out our quick guide on refilling your lighter quickly. Using low-quality butane is going to continue to keep causing you problems, so make sure you’re using quality when you refill. For more info, I’ve got a post on the best butane for torch lighters that might help you out.
Step 4: The Clog Cleanup (How to Clean a Torch Lighter Nozzle)
Using a torch lighter for lighting cigars, campfires, or DIY projects means it is constantly exposed to microscopic debris that includes fine ash, pocket lint, dust, etc. This debris is the number one silent killer of premium torch lighter burners. Learning how to clean a torch lighter is the single best way to extend its lifespan, especially for high-velocity jet lighter models exposed to cigar ash or outdoor debris. Here is the safest method for how to clean butane torch nozzle surfaces without scratching the delicate internal metal ports.
Here’s how to fix the problem:
- The Fix: Use a can of compressed air. Hold the straw attachment about an inch away from the jets and give it three short, sharp bursts. This safely dislodges loose dust without introducing moisture.
- The Critical Mistake: Never, under any circumstances, blow into the jet nozzles with your mouth. Your breath contains heavy moisture that will cause immediate internal corrosion or clump the loose ash into a permanent, cement-like block inside the micro-jets.
- The Fixer’s Deep-Clean Secret: If the clog is stubborn or covered in soot, dip a soft-bristled toothbrush or a Q-tip into 90% Isopropyl Alcohol. Gently scrub the brass metal area surrounding the jet. Crucial: Let the lighter sit and dry completely for at least 5 minutes before striking it. You want all alcohol fumes to evaporate so you don’t accidentally ignite your hands or your workbench.
- The Needle Warning: Do not stick sewing needles or safety pins down into the burner holes. These micro-nozzles are engineered to microscopic tolerances. Hard metal needles will scratch, distort, or widen the holes, permanently ruining the “jet” pressure and turning your windproof torch into a lazy, yellow candle flame.
Step 5: Knowing When a Lighter is Truly Dead
As someone who has disassembled and repaired hundreds of these devices, I hate to admit it, but some lighters are simply beyond saving. If the internal structural components fail, it becomes a waste of your time—and your expensive, high-quality fuel—to keep fighting it.
Furthermore, trying to modify or force a structurally broken butane tank to work is incredibly dangerous. It turns a pocket tool into a literal pocket bomb.
It is time to retire your torch lighter if you encounter any of these three fatal flaws:
The “Ghost Hiss” (Broken O-Ring):
If you experience a butane torch hissing from bottom fill valves or leaking around the top burners when it is just sitting there, the internal seals are shot. This structural failure is the number one reason why butane torches stop working permanently. It cannot be safely glued or patched. Send it in for repair if it’s still under warranty or… simply toss it.
The “Mushy Click” (Broken Piezo Spring):
When you press down on the ignition button, you should feel a distinct resistance followed by a sharp, metallic “snap” sound. If the button goes down completely smooth, soft, or mushy with zero click, the internal mechanical Piezo spring has snapped. Unless you have a donor lighter and advanced microscopic repair tools, the ignition system is dead.
Visible Tank Stress Fractures:
Inspect the fuel reservoir casing closely. If you see any hairline cracks, white stress marks in the plastic, or fuel weeping through the seams, stop using it immediately. The structural integrity of the pressure vessel is compromised.
If it’s time to get a new lighter, check out my post on the best torch lighter brands to help you find a solid and reliable torch.
Also, make sure you check out my post on the safe disposal of lighters to make sure you don’t create a hazardous waste problem in your trash.
I almost hate to mention this, but a lot of torch lighters are finicky. Over the years, I’ve had a few friends get so frustrated with them that they switched over to matches or even Zippo lighters. With that said, if you ever plan to jump into the world of Zippos, check out my guide on how to tell real Zippos from fakes.
Popular Posts:
Best Butane for Torch Lighters | Clipper Jet Not Working | Best Single Jet Torches | Most Reliable Torch Lighters For Cigars
Why Your Torch Lighter Won’t Light After a Refill
If your lighter worked perfectly fine five minutes ago but suddenly won’t light right after you refilled it, you are likely dealing with one of two very common issues: a cold tank or vapor lock.
1. The Temperature Drop (The 10-Minute Freeze)
When compressed liquid butane shifts from the pressurized refill can into your lighter’s tank, it undergoes a massive temperature drop. The lighter becomes freezing cold to the touch. This intense cold shrinks the internal rubber O-rings and stops the butane from vaporizing properly.
- The Fix: Never try to force-light it immediately. Set the lighter down on a room-temperature counter and wait 5 to 10 minutes. Once the casing warms back up to room temperature, the fuel will vaporize normally, and it should strike on the first click.
2. The Vapor Lock (Trapped Air)
If you filled the lighter without bleeding out the old pressure first, you trapped ambient air inside the fuel tank. This air creates a pocket of high pressure that tricks you into thinking the lighter is full, while blocking the actual liquid fuel from feeding into the ignition lines.
The Fix: If it still won’t light after warming up, you need to perform a complete purge (which we cover step-by-step in Step 3 below) to bleed out that trapped air bubble.
Torch Lighter Troubleshooting FAQs: The Most Common Torch Problems and Solutions
Over the years, I’ve answered thousands of comments from frustrated people whose lighters suddenly quit. Here are the quick, straight-to-the-point answers to the questions I see landing on my workbench every single week.
Why does my torch lighter hiss but won’t light?
A loud hissing sound with zero flame almost always means your flame adjustment dial is set too high. The sheer pressure of the rushing butane gas is literally blowing out the spark before it has a chance to catch. Turn your adjustment screw or wheel all the way down to the absolute negative (-), then slowly dial it up in tiny increments until you find the sweet spot where it ignites consistently.
Why do I have to click the igniter 5 or 10 times just to get a flame?
This is the classic symptom of a misaligned igniter wire electrode. If that tiny wire inside the nozzle is bent even a millimeter away from the center, the spark won’t jump through the path of the rising gas until a thick, dangerous cloud of butane builds up around it. Use a wooden toothpick to gently nudge the wire closer to the center of the jet. If that doesn’t work, your tank likely has an air pocket and needs a deep purge.
Why do BBQ torch lighters and long-neck utility lighters stop working over time?
Long-neck BBQ and utility lighters usually fail for two reasons: internal fuel line kinks or outdoor moisture exposure. Because the necks are long, the internal flexible plastic fuel line can twist or pinch over time, choking off the gas. Additionally, leaving them out by the grill exposes the internal piezo clicker to humidity and moisture, which rusts the ignition points and kills the spark.
Why is my torch lighter flame yellow instead of blue?
A healthy torch should always burn a crisp, roaring blue, which indicates perfect fuel combustion. A yellow, lazy flame means your butane isn’t mixing with enough oxygen. Check the small air intake vents wrapped around the collar of your lighter. If they are blocked by pocket lint, ash, or even your fingers while you hold it, you choke the oxygen mixture. Give those outer vents a quick blast of compressed air.
Can I use a regular needle to clean out a clogged jet?
Absolutely not. The nozzles inside a jet torch are precision-machined to microscopic tolerances. Shoving a hard steel sewing needle or safety pin down into those holes will easily scratch, bend, or permanently widen the opening. Once widened, the jet engine pressure effect is completely ruined, and your lighter will permanently emit a weak, useless candle flame. Stick strictly to compressed air and 90% rubbing alcohol.
Is it safe to put my lighter in the freezer before refilling it?
While old-school cigar lounges swear by the freezer trick to get a denser fuel fill, I highly advise against it. Modern torch lighters rely on delicate rubber O-rings to keep the pressurized gas from leaking. Subjecting those tiny rubber seals to freezing temperatures makes them brittle, causing them to crack, snap, and develop permanent, unfixable leaks. Just let your lighter rest on a cool countertop for 5 minutes instead.
Why does my lighter work fine when it’s full, but starts failing at half-tank?
This is a classic fuel pressure failure caused by cheap, low-grade butane. High-quality fuel maintains steady vapor pressure even as the liquid volume drops. Low-grade, generic gas lacks that consistent pressure, meaning it can’t push through the tight jet nozzles once the tank isn’t completely full. Switch to premium multi-refined fuels like Xikar Purofine or Colibri to utilize every single drop in your tank.
My lighter gets blazing hot after just a few seconds of use. Is that normal?
While torch flames hit temperatures up to 2,500°F, the metal housing shouldn’t become untouchable instantly. If it does, you are dealing with afterburn. This happens when microscopic debris or soot traps a tiny amount of gas right at the nozzle base, causing the flame to burn inside the metal cup rather than shooting cleanly out. Clean the jets with compressed air immediately to prevent melting your internal seals.
What is the mandatory Wait Time after a refill, and is it really necessary?
It is 100% necessary if you don’t want to ruin your lighter. Liquid butane leaves the refill can at sub-zero temperatures. Trying to strike the lighter immediately means trying to ignite freezing cold gas while your internal O-rings are totally shrunk from the cold shock. You’ll get a sputtering, dangerous, lazy flame. Always wait a full 5 to 10 minutes for the lighter to return to room temperature before striking it.
How do I fix a Scorch Torch, Vertigo, or Maven torch that’s not working?
Whether you have a premium Vertigo lighter, a heavy-duty Maven, or a Scorch Torch that isn’t working, the most effective fix is a total system reset. Empty the fuel tank, clean the burner with compressed air, and ensure your flame adjustment wheel is set to a medium setting. No matter what brand of torch you have, troubleshooting steps show that 90% of failures are fuel-pressure or burner clog-related, so very easy to fix.
What should I do if my Clipper jet lighter is not working?
If you find your Clipper jet lighter not working after a refill, remember that Clippers are highly sensitive to fuel quality and internal air pockets. Always perform a deep system bleed (purging) before adding fresh butane, and verify that you are using a premium, multi-refined butane brand to keep the jet nozzle firing cleanly. See my Clipper Jet troubleshooting guide here.
A Final Word: Maintenance is Cheaper Than Replacement
Before you run out and spend $60 on a brand-new premium torch, or go buy another handful of cheap plastic disposables, pull up to your desk and try the Fixer’s Reset: purge the trapped air, clear the jets with a blast of compressed air, and center that tiny spark wire.
In my years of working on these devices, I’ve found that the vast majority of “dead” torches just need a little maintenance, a clean path, and high-quality fuel.
Got a stubborn lighter that’s still refusing to strike? Drop a comment below with the exact brand (Eagle, Xikar, Vector, etc.) and what it’s doing. I check the comments regularly and am happy to help you troubleshoot your setup!

- Best Torch Lighter Brands In 2026 - July 3, 2025
- Best Pocket Torch Lighters In 2025 - June 30, 2025
- How Does a Torch Lighter Work? - June 29, 2025